Final Exam
Engineering Design Process.
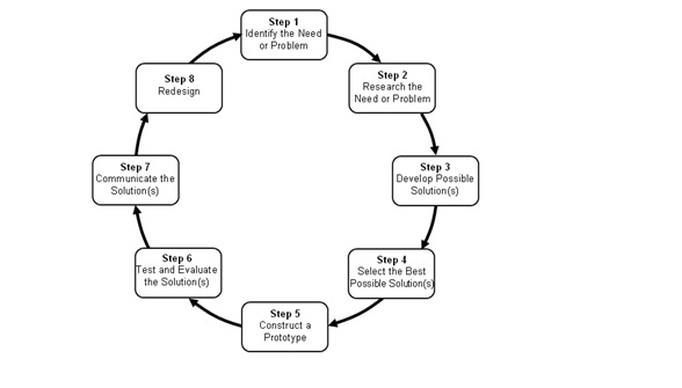
Step 1. Identify the problem that needs to be solved in a certain parameter; such as how much time and money you have to solve the problems
Step 2. Research the problems and ideas that help you develop possible solutions. Researching just helps you understand (why,how, what, who, etc) the object is going to be built.
Step 3. Start to develop possible solutions that can solve the problem. This is what you think can be done in order to make everything work out.
Step 4. Evaluate and pick the best solutions out of the possible outcomes you have. This means, to decide what will be the best thing to do out of all the possible outcomes you have.
Step 5. Begin to build the prototype. This means create whatever object you are creating (with the solutions you have decided in it) that solves the problem.
Step 6. Test and evaluate the solutions. Based on your prototype decide what is right or wrong with the robot. Think of certain ways you can make it better and determine if the prototype meets your expectations.
Step 7. Communicate the solutions. That means out of the testing you did on your prototype; decide ways that can solve the problems (things you think you can make better). For example, if you build a build a computer and it overheats, step 7 would be, " a solution to that is to add a fan".
Step 8. Redesign. That means based on your solutions you think that can make the prototype better and rebuild it in order to solve the problem better. This step may not be needed if the object was perfect the first time.
Programs


|
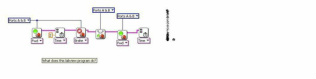
1. This program tells the robot to go forward with two motors for two seconds and then brake. Then the robot steers in a direction and goes forward for a given time.
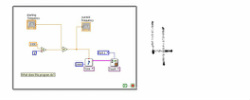
2. The robot travels 12.56 inches. 720 degrees equals 2 rotations of the wheel. The wheels circumference is 6.28 inches. 2x3.14 = 6.28 6.28x2(rotations)= 12.56 inches 3. When the light senses that the light is on, the robot's port A motor is turned on. When the light sensor senses that there is no light, the motor runs in reverse. 4. This program uses a touch sensor. When the sensor button is depressed, a tone plays from the robot. Each time the button is pushed the tone gets a progressively higher pitch. |
Line FollowerCockroach BotThunderStorm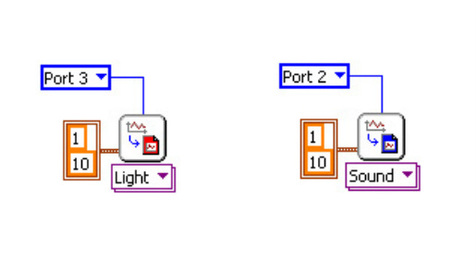
|
Table BotTelephone ALert |
